How to Install Faux Grass: 9 Steps From Bare Ground to Finished Lawn (DIY Guide, 2026)
As an Amazon Associate we earn from qualifying purchases.
Most of a faux grass install happens before the turf comes out: the digging, the base and the compaction decide how it looks for years.
Installing faux grass means replacing a lawn with a compacted stone base and turf that's pinned down and seamed together. The turf itself goes down in an afternoon. The ground underneath takes the real work. Get the base flat, firm and sloped, and the lawn stays smooth and drains for years. Rush it, and you get dips, puddles and seams that open up by next summer.
This guide walks through the whole job, from tools to final brushing. We built it from installer, retailer and editorial guides, including NexGen Lawns, Bob Vila and UK retailer eDecks. Those sources don't always agree on depths and spacing, so we give the ranges and flag where they differ.
At a glance
| Time | One weekend for a small, flat yard with two people |
| Difficulty | Moderate. The digging and compaction are physically hard |
| Cost | Materials plus tool hire. See our DIY cost guide |
| Golden rule | Follow your turf maker's instructions on base depth and nail spacing |
Installing on something other than soil? See faux grass on concrete or faux grass for uneven ground.
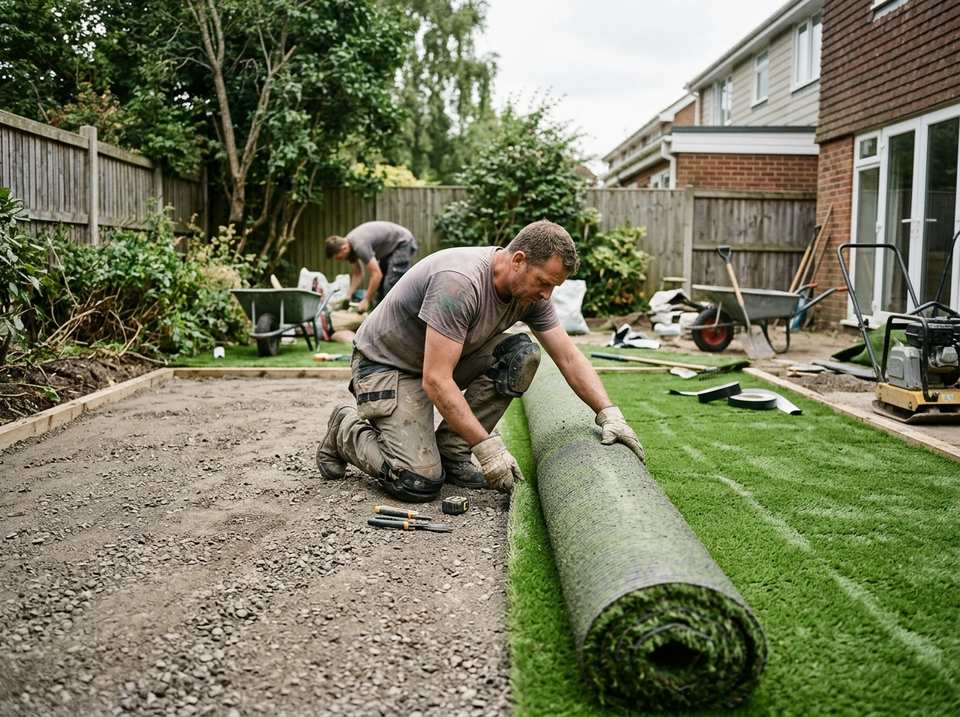
What tools and materials do you need?
Gather everything before day one; a rented compactor is the only big-ticket tool. Here's the full list:
Tools
- Sod cutter or flat shovel. A rented sod cutter lifts old grass in strips. A shovel works for small areas.
- Plate compactor. Rent one. It's the tool that makes or breaks the base. See our plate compactor guide.
- Landscape rake. For spreading and levelling the base.
- Utility knife with spare blades. Turf blunts blades fast. Change them often.
- Knee kicker. Stretches turf tight and removes wrinkles. See our knee kicker guide.
- Hammer or mallet. For driving nails and stakes.
- Drop spreader. For even infill.
- Power broom or stiff brush. Lifts the blades and works in the infill. See our power broom guide.
- Tape measure, string line and marker.
Materials
- Turf. Order 5 to 10% extra for trimming and odd shapes.
- Base aggregate. Crushed rock or decomposed granite (DG). See our base guide.
- Weed barrier (optional). See our weed barrier guide. LAVEVE sells a landscape fabric roll on Amazon. Check price on Amazon
- Seam tape and turf adhesive. See our seam tape guide. Seam tape on Amazon
- Nails or U-pins. Galvanised landscape nails or U-shaped staples. See our nails guide. Turf stakes on Amazon
- Infill. Silica sand or a specialist infill. See our infill guide.
- Edging (optional). For a clean border. See our edging guide.
The 9 steps to install faux grass
Follow these nine steps in order; skipping the compaction step is the most common reason DIY lawns fail.
Step 1: Measure and order with surplus
Measure the longest length and widest width of the area, including curves. Turf comes in rectangles, so you buy the box around your shape. Then plan your roll layout so you cover the width with the fewest seams. Order 5 to 10% extra, more for odd shapes, as BestHomeGear advises. See our roll sizes guide.
Step 2: Remove the sod and dig out
Strip the existing grass, roots and all. A sod cutter makes this far quicker. Then dig down. NexGen Lawns recommends digging about 3 to 4 in deep, so there's room for the base. Dig a little deeper on clay soil, which drains poorly. Remove large stones and roots as you go.
Step 3: Lay a weed barrier (optional)
On ground with stubborn weeds, lay a permeable weed barrier over the soil. Overlap the edges by a few inches. Some installers skip this when the base is deep and well compacted. It's cheap insurance in weedy yards.
Step 4: Spread, grade and compact the base
This is the most important step. Spread crushed rock or DG in an even layer. Bob Vila suggests about 2 to 3 in of base. Rake it smooth, then grade it so it slopes gently away from the house. NexGen recommends a 2 to 3% slope, which is about 1/4 to 3/8 in of drop per foot.
Then compact it with the plate compactor. Lightly mist the base with water and run over it several times in overlapping passes. A properly compacted base is firm enough that a footprint barely marks it. For depth on base materials, see our base guide.
Step 5: Unroll the turf and let it relax
Roll the turf out over the base and leave it in the sun for a few hours. Warmth relaxes roll creases. Then check that every piece has its blades pointing the same way. Two pieces laid in opposite directions look like two shades of green. Ideally, point the blades toward the house or main viewing spot. See our wrinkles guide if creases stay.
Step 6: Cut to fit from the back
Flip the edge back and cut from the back of the turf, between the stitch rows. Cutting from the back gives a straight, clean line without chopping blades. Leave a little extra at first, then trim to the exact edge. Change your knife blade often. A blunt blade drags and tears the backing. See our cutting guide.
Step 7: Seam the pieces together
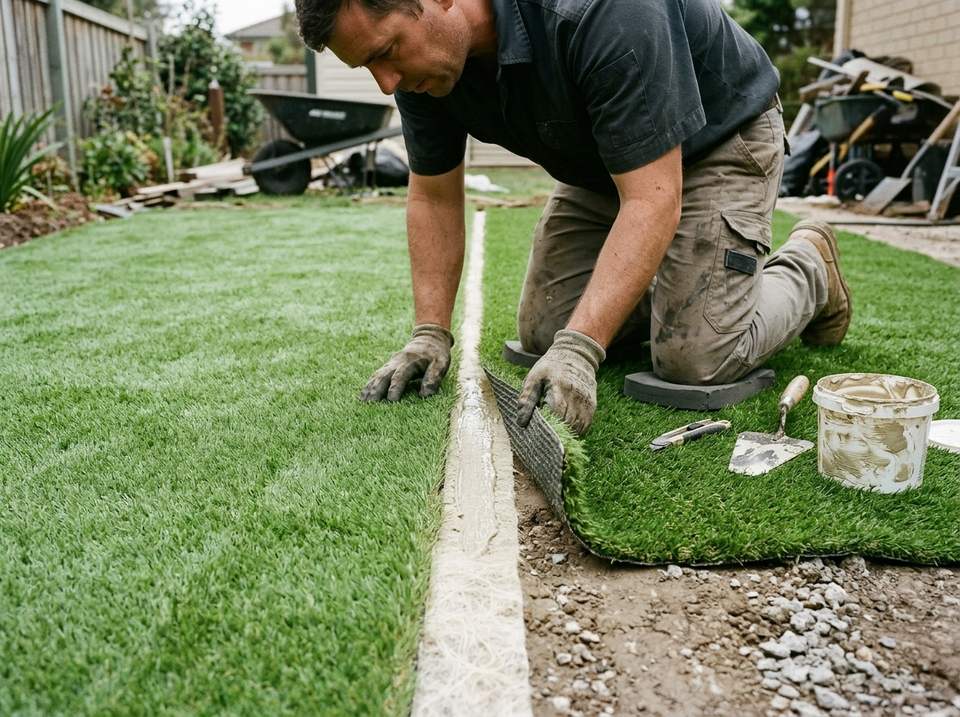
Seams are where DIY lawns look DIY, so take your time. Trim the factory edge off both pieces, usually two or three stitch rows. Then butt the two edges together, with no gap and no overlap. Fold both edges back, lay seam tape shiny side down on the base, and spread turf adhesive on the tape. Fold the edges back down onto the glue and press firmly along the whole join.
Keep blades out of the glue as you press. Then let it cure before walking on it. See our seam tape guide and adhesive guide.
Our take: from joining artificial grass on event stages and backdrops, the seam is the first thing the eye and the camera catch. Matching the grain direction and brushing the blades across the join afterwards hides it far better than any amount of extra glue.
Step 8: Anchor the edges and seams
Now nail the turf down. Sources differ on spacing here. Bob Vila suggests spikes about every 4 ft around the perimeter. UK retailer eDecks recommends U-pins about every 200 mm, roughly 8 in, along seams. Those figures aren't in conflict: seams need closer fixing than open edges.
So the safe rule is simple. Follow your turf maker's spacing. If they don't give one, fix seams closely and the perimeter at least every few feet. Push nails in between the blades so heads don't trap fibers. Use the knee kicker to stretch out any ripples before you fix each section.
Step 9: Add infill and brush
Spread infill evenly with a drop spreader, in a few light passes rather than one heavy one. Brush it down into the blades with a power broom or stiff brush, against the grain. Infill weighs the turf down, supports the blades and helps it look full. Your turf maker usually states how much infill to use per square foot. See our infill guide.
Finally, give the whole lawn a light rinse to settle the infill. Then step back. That's the job done.
How long does installation take?
Excavation and base work take most of the time.
| Yard size | Crew | Rough time |
|---|---|---|
| Small, flat yard (a few hundred sq ft) | 2 people | 1 to 2 days |
| Medium yard | 2 to 3 people | 2 to 4 days |
| Large yard or slopes | Crew with machinery | Several days or more |
These are rough ranges. Hard clay, tree roots, slopes and lots of seams all add time. On most jobs, removing the old lawn and building the base take more time than laying the turf.
Common installation mistakes
Eight mistakes cause most DIY turf problems. Avoid these:
- Skipping or rushing compaction. An uncompacted base settles into dips and ruts within months. This is the big one.
- An uneven base. Every bump and hollow shows through turf. Rake, check with a straight board and re-compact.
- Mixed grain direction. Pieces facing different ways look like patches of different colours.
- Visible seams. Gaps, overlaps or blades caught in glue make seams obvious. Butt edges tightly and keep blades out of the adhesive.
- Too few nails. Loose edges lift, curl and become trip hazards. Fix seams and edges properly.
- No slope. A flat base holds water. Grade it so rain runs off.
- Laying on a wet base. A soggy base won't compact well and can move under the turf. Wait for it to dry.
- Skipping infill. Without infill, many turfs wrinkle, shift and look flat. Use what the maker recommends.
And if you've already made one of these, see our repair guide.
Should you DIY or hire a pro?
DIY makes sense for small, flat yards; slopes and large lawns are worth a pro.
| DIY | Professional install | |
|---|---|---|
| Cost | Materials and tool hire only | Materials plus labour |
| Savings | Vendors estimate roughly 35 to 60% off a pro install | — |
| Time | Your weekend, or longer | Usually faster, with a crew |
| Physical effort | Hard: digging and compaction | None for you |
| Best for | Small, flat, simple shapes | Slopes, large areas, complex shapes |
| Warranty | Turf warranty only | Often an installation warranty too |
Is it cheaper to install artificial grass yourself? Yes, usually by a lot, because labour is a big part of the cost. Treat the 35 to 60% range as a vendor estimate. But a bad DIY base can cost more to fix than a pro install would have. See our DIY cost guide and faux grass cost guide.
Installation questions
These are the questions DIY installers ask most.
Can you lay turf over existing grass? It's not recommended. Living grass rots under turf, which causes dips, smell and poor drainage. Remove it and build a proper base. For bare soil, see faux grass for dirt.
Can you install turf in the rain? Avoid it. A wet base won't compact properly, and adhesive needs dry conditions to bond. Wait for a dry spell.
Do you need infill? Most turfs benefit from it, and many makers require it to keep the warranty. It weighs the turf down and supports the blades. Some low-pile and specialist turfs don't need it, so check your turf's instructions. See our infill guide.
Ready to pick your turf? Go back to the faux grass guide for every type and use.